Diy » Making front panels with decals
When i design enclosures for my projects, the goal is to make it look professional as much as possible. I put many hours into designing, building and painting. Sure, I could go and buy a ready-made case, but I would not get the satisfaction that you get from designing and building it yourself. Most of the equipment in my rack cabinet is custom-made, even the rack itself. This article describes in details the techniques I use and how I apply the decals to the front panel.
I usually use the 1U CH-14401 bare rackmount chassis from Bud Industries (8in x 19in x 1U) which is more than enough for most projects. It also available in 2U height and various depth (4”, 8” and 16”). The chassis is made from 0.050” thick aluminum except for the removable front panel which is 1/8” thick.
Cutting holes for components
First, i start by creating a 3D model of the case in SolidWorks. I then add the differents components to the model and add the cutouts to the front and back panel. Once the model is finished, I export the model of the front panel to a drawing view (Files => Make drawing from assembly). I now have a front view representation of the panel which i can use as a cutting template.
Then, i print out this drawing view to scale and glue it down to the panel. To cut small rectangular openings, I first drill a hole in the center big enough to insert a metal file then work my way to the border of the opening on each sides. For larger cutouts, I use a Dremel with a cutting disk.
Painting
I use Tremclad spray paint for metal. It can take up to a week to paint a part as i spray multiple coats separated by a day of drying. I sand away imperfections and dust particles with a fine grit sand paper(2000) between coats.
I also use a spray can handle attachment that you can find in any hardware store. This immensely improve the quality of the paint job because it gives you better control over the flow, avoid over spraying and gives a more even coat. It is very important to spray at a certain distance, about 10 inch, from the surface to be painted. If it is too close, the coating will be uneven and you will have runs.
Making the decals
Disclaimer : I am not affiliated in any way with decalpro fx, this is just what i happen to use.
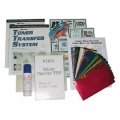
To make the decals, i use the toner transfer system (Decalpro FX, available at Digi-key). It consist of a toner transfer sheet, a color overlay and a mylar carrier foil. The transfer sheet is a 8.5” x 11” sheet you print on using a laser printer. When exposed to water, it will release the toner from its surface allowing it to be transferred to another medium. Since the toner is black, it can be used as is or you can apply colors by using the toner reactive foil (TRF). The mylar carrier is used to temporarily carry the toner from the transfer sheet to the final surface.
It is very easy to screw it up, but once you get used with the process, it can produce a pretty descent quality decals.
These are the required steps :
-
Print the decals on a standard paper sheet, just to make sure the decals will fit perfectly. Once you’re sure everything is ok, print the decals again on the transfer sheet. You need to add a 1/4 inch border around your decals. This is crucial, otherwise, the decals will break up when the toner detach from the transfer sheet. Also, i found out that working with smaller sections (2 x 2 inches) at a time is much more easier. I divide my decals in smaller groups and print multiple version of each groups on the sheet. That way, if I screw up one area, I don’t have to start the whole process all over again…
-
Before applying the TRF (toner reactive foil), thoroughly dry the transfer sheet with a heat gun. Any moisture left will ruin the transfer as the TRF will stick to the any area where it is still humid. You must use a heat gun, a hair dryer is not hot enough.
-
Next step is to apply the TRF, this will be the visible side of your decal. To fuse the TRF to the toner, you need a laminator set on high heat (5 mil). Put the transfer sheet with the TRF on top on a 1/16” fiber glass board (provided in the decalpro starter kit). Pass the transfer sheet 2 times thought the laminator 2 times. Once it is done, let it completely cool before peeling away the TRF. Start from the corner and slowly peel back the foil and pull it downward. Once the TRF is removed, the foil will remains only where the toner is. Some foil may remain in areas not covered by toner (especially inside small letters. eg. “e”). The next step will take care of this problem.
-
Apply several strips of 3M 2080 blue masking tape (painter’s tape) over the transfer sheet in an overlapping fashion. Lightly press down the masking tape to make sure it stick to the sheet and then slowly peel it away at a 180 degree angle. Do not pull it straight up. The foil in areas that are not supposed to be there will stick on the tape. Once all the tape is removed, repeat the same process in the opposite direction.
-
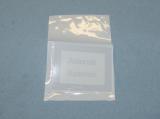
Next, apply the mylar carrier over the decal. It is only temporary, there is no glue nor will it fuse to the toner or foil but will merely cling to the decal. The best way to do that is to put both the transfer sheet and the mylar film side by side on a paper towel. With another piece of paper towel folded in four, gently swipe both of them. This will create a static charge on the mylar film and will cling to the transfer paper. What is left to do is to pass it in the laminator 2 times. If you see the mylar uncling, even partly, forget it, it won’t work. Remove it and start again (This is the most frustrating step). Also, Make sure there is no dust trapped between the two sheets. Tip: For the TRF foil or mylar film, it is best to cut a piece 1.5 times longer than what you need. That way, you can fold the remaining foil under the carrier board making it easier to hold it in place while you pass it in the laminator.
-
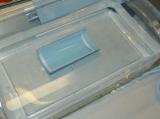
Once the mylar is securely in place, cut away the excess mylar while making sure you don’t lift the film. Then submerge it slowly in water. There is a direction that the sheet will curl naturally, it is important to put the sheet in the water in that direction. After a minute or two, the backing paper will start to dissolve, releasing the toner along with the mylar film. Don’t force it, be patient. You can agitate the water lightly to facilitate the process, but not too much. When it is completely released, the remaining of the transfer sheet will sink and the mylar film will float to the surface.
-
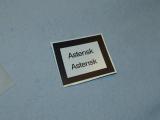
GENTLY wipe the excess water and let it dry. With a sharp exacto, cut away only the part of the decal you need and place it on a paper towel toner side up (black). If the piece is really small, you may need to put masking tape on the corners to hold it down for the next step.
-
Spray a light coat of glue (Sulky KK-2000) at a distance of about 30 cm (12 inch) from the decal. It is difficult to apply the right amount. Too little, the decal won’t hold, too much, there will be visible traces around the decals. If you hold the sprayed mylar 12 inch away from the digits of the code bar on the spray can, you should still be able to read it.
-
Dry the glue it with a heat gun for about 10 seconds.
-
This step is the most delicate part. Position your decal on the panel and rub down the decal making sure you go over each letters or lines. Then, slowly peel away the mylar, again at a 180 degree angle, don’t lift it upwards. The decals will remain on the panel. If you see some parts of the decal starting to lift, put back the mylar, rub down the area and try again.
It is very important to let it dry for a couple of days if you intend to apply a clear varnish coating over the decals. If you don’t wait long enough, the decals will lift and float away on the varnish coating. I screwed up an entire paint job because of that, i had to start all over because it looked like complete crap! Also, give it a week to let dry your base coat before applying your decals. It gives better results and if you make a mistake, it is easier to remove the decal without screwing up the base coat. If you need to remove a decals, don’t use any solvents, use masking tape instead and repeatedly stick and pull the tape over the decal to remove until it all comes off. This will only work for recent application (within 30 minutes), once the glue is completely dry, it’s too late.
Multi color decals
It is not possible to apply multiple layers of decals at the same location. The problem is that when you try to apply the second layer, the mylar will stick to the previously applied layer and pull it away. If the second layer don’t overlap the first one, you can use a mask. Take a piece of paper and cut away a portion that correspond to the area where you want to apply the decal. There must be no parts of the first layer visible through the mask cutout, otherwise, the mylar will stick to it and pull it away. This works fine for larger area but it’s really difficult with smaller areas. So, I do the following :
- Apply the first layer
- Wait a week to let it dry completely
- Spray 2-3 thin coats of varnish
- Wait another week
- Apply the second layer
That way the first layer is protected by the varnish and won’t lift up when you pull away the mylar film. By doing it that way, it is possible to overlap layers. I used that technique for my pfsense firewall chassis.
Finishing
I spray a clear varnish coating to seal both the base coat and the decals. It is done in the same way as the base coat, multiple layers over a span of a week and fine grit sanding between each coat except the final one.
From start to finish, it can take up to 3 weeks to build an enclosure.


